Category Archives: Recipes for Kids

Recipes for Families, Toddlers, Kids, Fussy Eaters and Picky Eaters

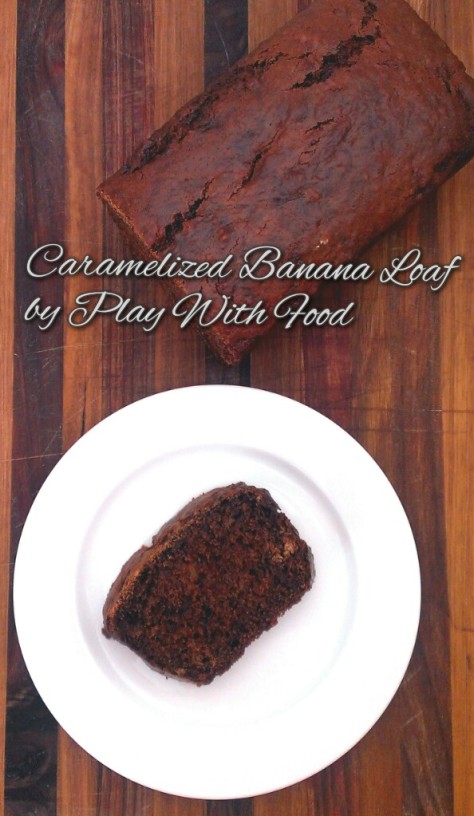
Caramelized Banana Loaf

This recipe is so easy to whip together that my toddler could do it. In fact – she did!  Warning: the baking time is long at 2.5hrs – but the deep caramelized flavour is worth it.

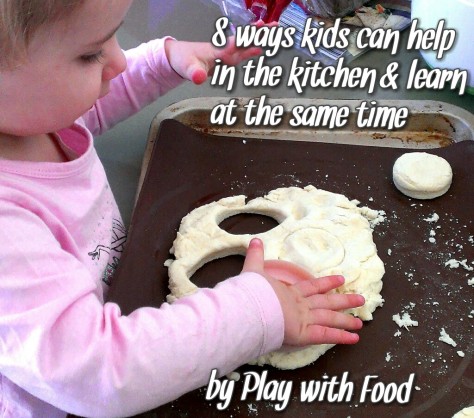
Getting  kids in the kitchen is a great way to increase their exposures to foods, learn language skills, practice fine & gross motor skills as well as keeping them busy (and hopefully out of mess creating mischief). Fussy eaters get so many benefits from increased food exposures, including those away from mealtimes – read more here!

image

8 ways kids can help in the kitchen & learn at the same time:

1) Measuring and tipping ingredients into the bowl helps with motor planning & learning about volume.
2) Mixing ingredients in the bowl is great for learning to control the speed of the spoon.
3) Threading wooden skewers is great for fine motor skills.
4) Mashing softened fruits or vegetables with a fork is great to learn about changing textures.
5) Cracking eggs into a separate bowl for more motor planning experiences.
**hot tip: use other bits of shell to scoop out shell that accidentally goes into your eggs.**
6) Hand over hand grating is great for sensory exposure – let them feel the fruit or vegetable as well as the vibration of the grater safely by controlling and holding their hand in yours away from the blades.
7) Practice counting and numbers by setting timers or helping to use scales.
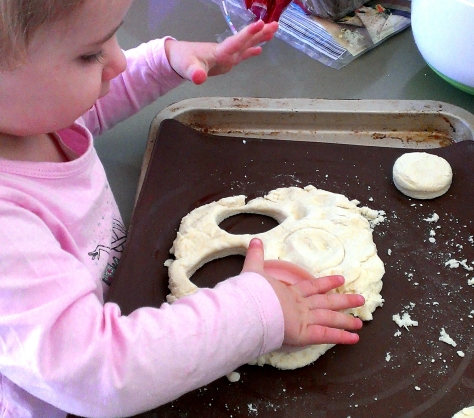
8) Using cutters to make and learn shapes in dough, bread, fruits, vegetables and pancakes

image

Caramelized Banana Loaf

Ingredients:
3 ripe bananas
1/2 cup sugar
1/4 cup honey
2 eggs
3 tsp bicarb soda
1/4 cup macadamia nut oil (or other oil / butter of your choice)
1 1/3 cups flour (you can use a combination of wholemeal and  plain white flour for this)
1/3 cup natural yoghurt (for dairy free opt for 1/2 cup almond milk instead)

Method (steps that kids can do are put in italics):

  • Line a loaf tin with foil (shiny surface facing inwards)
  • Preheat the oven to 130oC
  • Measure out the following ingredients into little bowls; bicarb soda, flour, natural yoghurt, oil, honey and sugar. You can also crack the eggs into separate bowl, check for shell & lightly whisk. This step is optional depending on your child’s involvement and skill set.
  • Mash the bananas in a large mixing bowl with a fork – I like to use a plastic bowl with a non-slip bottom to assist my toddler with her tasks. Having a bowl that slips and slides is frustrating and difficult to process for the little chefs.
  • Add the bicarb soda, sugar and honey to the bananas and mix.
  • Mix in the following ingredients in this order:
         Eggs
         Macadamia Nut Oil
         Flour
         Natural Yoghurt
  • Pour the batter into the loaf tin
  • Put it in the oven for 2.5 hours or until it is cooked through (ie  a skewer or knife comes out clean)

This recipe is suitable for freezing by wrapping individual slices in cling film.  Take them straight from the freezer and put them into the lunchbox.

Do you have a tip for safely including your kids in the kitchen?

In our Sydney based workshops and classes for toddlers, preschoolers and early primary schoolers, I love to answer parents’ questions about engaging their children in activities with food.  Do you have any questions?  If you want to know when our classes are on – have a look here!

Happy Eating!

Simone
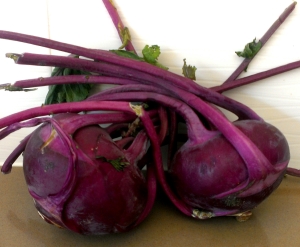
July is Kohlrabi Month

The monthly challenge for July is Kohlrabi.Kohlrabi

It is so cute the way my daughter (now 27 months old) says “coal-wabby”.  Her enthusiasm for my monthly challenge has really been wonderful.  We use the new fruits or vegetables to do some sensory exploration and talk about different attributes of them, increasing her vocabulary and language skills.

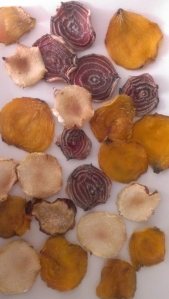
We tried Kohlrabi as chips & pickled.  Homemade chips are a great way for children to experience new vegetables if they are particularly fond of crunchy textures.

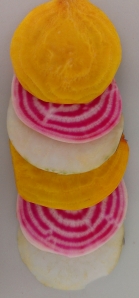
Golden Beetroot, Candy Striped Beetroot and Kohlrabii sliced ready for baking into chips
Chips in beautiful winter hues

Pickled in an asian style slaw was perfect for a few different applications
1) in a Vietnamese roll for a variation of a Bahn Mi
2) in Rice paper rolls with oyster sauce flavoured pork mince, bean shoots & fresh coriander

Kohlrabi Cooking: Rice Paper Rolls by Play with Food
Pork Mince, Bean Shoots, Asian Style Slaw & Fresh Coriander


Asian Style Carrot, Beet & Kohlrabi Slaw

Julienne your raw carrot, beetroot & kohlrabi so that they look like matchsticks.  In your bowl, make the pickling juice with the following ratio of ingredients 1 cup water: 2tbsp Caster Sugar: 2tbsp Rice Wine Vinegar: 1tsp Salt.  You will need enough to soak the vegetables in.

I like to let this sit for at least 30 min.  You can do this first and then make your chicken or pork ready to fill your rolls or rice paper rolls.

My toddler was not a fan of the texture of the rice paper roll but loved the pickled slaw.  Making rice paper rolls with a toddler is not a stress free event so I’d recommend saving this for a lazy Saturday afternoon.  Or use it as a mid-week dinner as a bahn mi style on a Vietnamese roll with some marinated chicken pieces and fresh cos lettuce.

Happy Eating!

Simone


Lady Marmalade

It’s a funny feeling when you accomplish something that a few years ago, I would have laughed out loud at it’s mere suggestion. Even more surreal to be blogging about it. We grew our own food & turned it into something beautiful. I feel like a total domestic goddess – that’s the bit that makes me laugh!

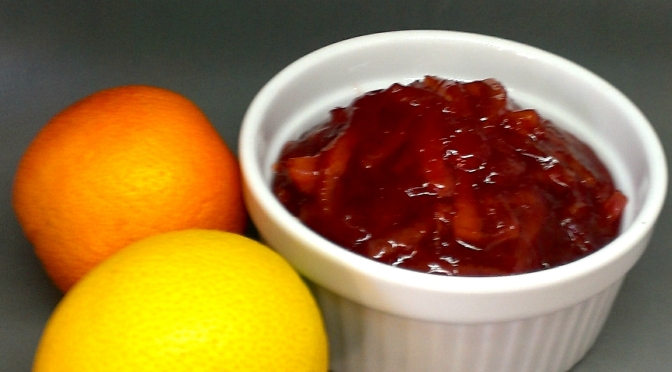
We have a substantial amount of blood oranges & lemons on our trees this year. So, I decided to try my hand at marmalade. I am chuffed with the results & how easy it actually was. Note: it does need overnight preparation.

Blood Orange & Lemon Marmalade

Ingredients:
3 blood oranges
1 lemon
3/4 cup sugar

Method:
Trim the top & bottoms of the blood oranges & lemons. Cut into quarters & remove the pithy cores & seeds. Finely slice each part of the citrus fruits & put in a bowl. Fill the bowl with water to make it up to 2 cups in volume. Leave to soak overnight.
In a saucepan, add the citrus water mix & sugar. Allow to boil with regular stirring. Simmer until the sauce thickens. It will thicken more after you remove it from the heat.

image

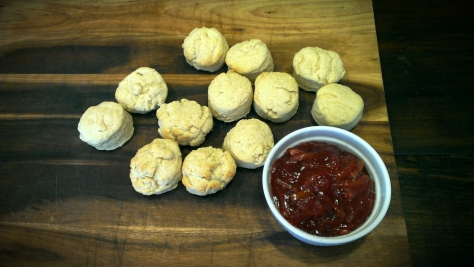
Serving suggestion for this marmalade is with scones. Even better if the scones have been made with love!

image

Happy eating!

June is Artichoke Month

Another Month = Another Challenge!

This month I took on artichoke.  This one was a real curve ball for me as the only time I have ever really used them was from a jar!  A 100g serve of Artichokes from a jar contains 320mg of sodium whereas steaming them fresh (without salt) gives 60mg of sodium. Depending on your total diet though this may not be a significant issue – it’s unlikely we are going to be adding a significant number of artichokes to our diet!  However, if you consider that the National Health and Medical Research Centre suggests we limit salt to 4g/day (1600mg sodium) and the Heart Foundation says 6g/day (2300mg sodium) and the average Australian consumes 8 or 9 times this amount, I think we should be mindful of what salt we add to our diet by using processed foods vs naturally occurring salt.

Now, I’ll jump off my nutritional science podium and chat to you about the main things I learnt during my challenge.

1) Preparing an artichoke is a bit perplexing but you can find awesome infographics on pinterest to help you!

Source of Image:  http://illustratedbites.wordpress.com/2012/10/15/prickly-treat/

How to Prepare and Artichoke

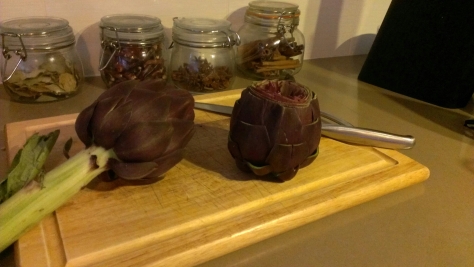
2) Talking about artichokes was a wonderful language building exercise for my toddler.  We looked at pictures of them on the internet and talked about what they may feel like before we went to the shops to choose some to cook.  My daughter was quite the sight walking around the green grocers with her “choke fwowers”. I figured that they did look like flowers and some multi-syllable words are still a bit tricky.  (The artichoke is actually the flower bud harvested before the flower blooms).  The preparatory talks about artichokes, built some excitement about going to the shops.  As you may have seen in my previous post about vegetable exposures away from mealtimes,  I did creatively use going to get the artichokes as a “bribe” to get her off the Peppa Pig coin operated ride and into the green grocer.

image

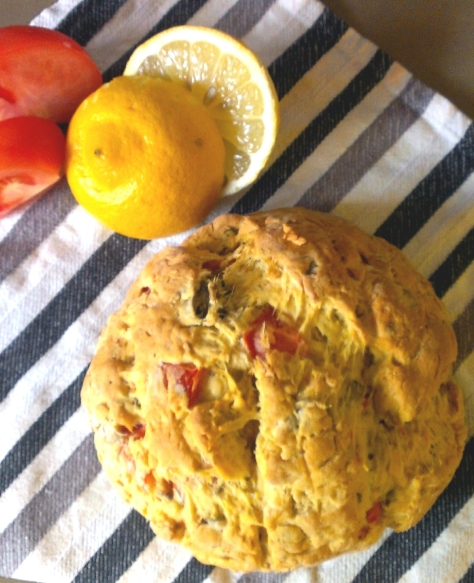
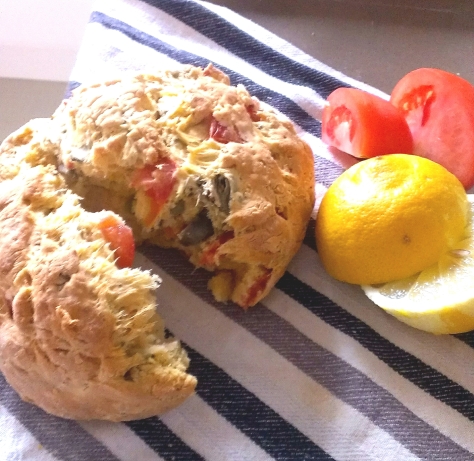
3) I made an Artichoke, Lemon & Tomato cob loaf with my steamed artichoke hearts that was really yummy and simple. Lemon is in season now & so very fragrant in this bread. I loved it served with some good quality butter, fresh ham & a side salad. The loaf is big enough for a light lunch for 2 adults & 2 kids.
image

Artichoke, Lemon & Tomato Cob Loaf

Ingredients:
1 Artichoke Heart
1 Tomato, Roughly Chopped
Zest from 1/2 Lemon
1/4 cup Parmesan, Finely Grated
2 tbsp Olive Oil
1 1/2 cup Self Raising Flour
1 Egg
Ground Black Pepper, To Taste

To prepare the artichokes, I trimmed it as per the above infographic.  Instead of putting them in the pot with salted water, I used a bamboo steamer and no salt – this worked well and in 20mins I had lovely steamed artichokes.  I tried one with a lemon & pepper yoghurt dipping sauce, which was OK.  I didn’t actually try to get my daughter to try the artichoke like this.  Scraping the flesh away from the leaves with your teeth is interesting but a bit of work for the limited fleshy artichoke that you get.

On my remaining artichoke, I cut away the hard leaves & was left with the heart.  I roughly chopped up the heart & yielded about 1/4 cup of chopped pieces. To the bowl I added the remaining ingredients. My toddler did some stirring & kneading of the bread with me. We put it on a dusted baking tray in the preheated (180oC) oven for about 30mins (until it sounds hollow when you tap on the bottom of the loaf).

image

Do you have a favorite artichoke recipe?
Happy Eating!

Dinosaur Cakes

So, I felt bad that my princess cakes may have excluded the boys. Today I asked my daughter what kind of cake would be green & she roared back at me “saurus cake”,  (ie. Dinosaur cake in Ellie speak).

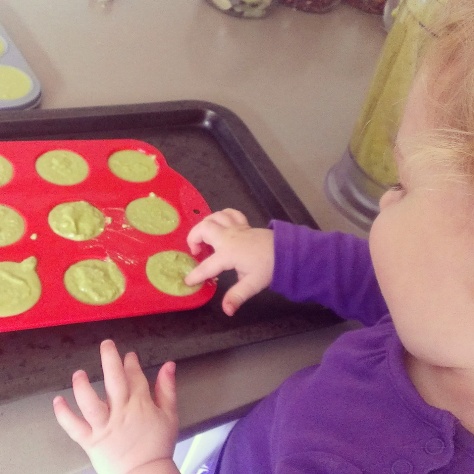
We set about a little ingredient experiment to change up our princess cake recipe to make them green instead of orange.  We exchanged the finely grated carrot with a cup of loosely packed baby spinach and omitted the cinnamon.

image

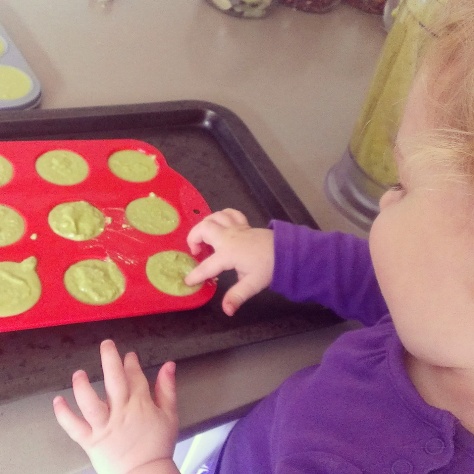
Pouring the batter from the blender into the waiting mini-muffin & patty cake tins is a great job for toddlers. You can also do some counting practice at the same time & we had some fun roaring like dinosaurs as we worked. The result is a moist & dense coconut flavoured mini cake that is egg free, gluten free, low in fat and packing some great vegie nutrients.

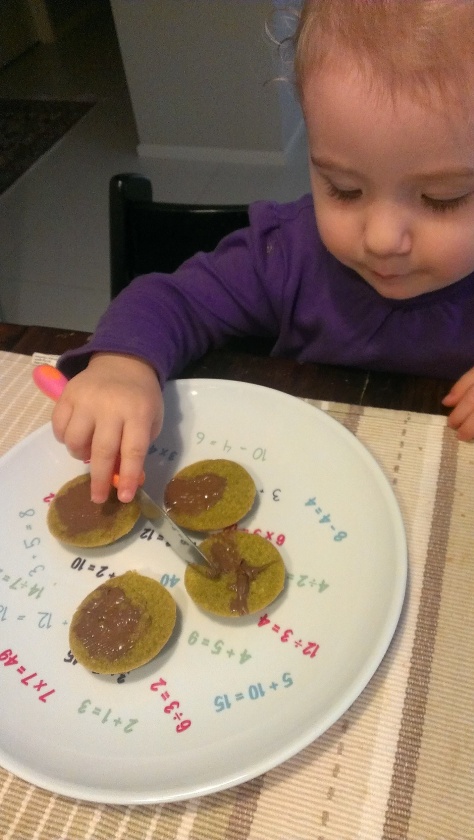
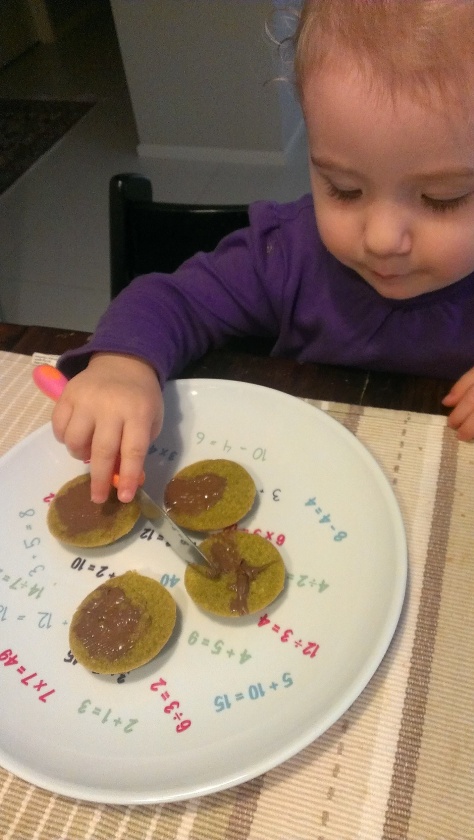
We decorated ours with a thin spread of nutella (like dino mud) and some shredded coconut. Have your child use a toddler knife to spread the nutella for motor planning practice. They will feel a great sense of achievement with their decorating.

image

We used our the busy mums store plate as a work surface for the decorating. The plate provides learning opportunities from colour recognition (toddler), number recognition (preschooler) to equation practice (primary schoolers). The plates are great quality & likely to last us that long! They are designed & sold by a local mum. Supporting local business is important to me- hence the little plug here! :p

image

Dinosaur Cakes

3/4 cup rice flour
1tbsp chia seeds, soaked in 2tbsp cold water for at least 10min
1 cup of loosely packed baby spinach
1/3 cup cooked sweet potato
1/3 cup brown sugar
1 cup milk
1tbsp butter
1/2 cup shredded coconut
1tsp vanilla extract

Preheat your oven to 180oC and grease your patty cake tin (or you can use mini cup cake holders). I used spray on coconut oil.

Put all ingredients into the blender. Whizz until all ingredients are well combined.

Pour batter into cake tin & bake for about 20mins (until cooked through). Tip: the mixture does not rise so fill the tins to the brim. Gently shake to level out the batter in the tin. This mix should make approx 24 mini-cakes.

To decorate these cakes we used nutella & shredded coconut.

All toddler cooking should be supervised.

Happy Eating!

Kids Love Chicken Meatballs

Observing the children who participate in my classes each week, I definitely see lots of patterns emerge about what kids do and don’t like to eat.  These patterns fit in so nicely with the current literature, studies and the tools I demonstrate.  I do find that MEAT is either a “Love it” or “Leave it” for most kids.  Meat is a textural minefield and many of the problems result from how it is prepared.  I obviously don’t cover meat in my classes – I only do fruits and vegetables – however, the routines we learn in class for the fruits and vegetables are directly transferable to your kitchen & table.

I do see children that have had allergies or currently have allergies.  A common allergy is egg.  Did you know that you can substitute egg with chia seeds?  (Well yes, if you have seen my post last week for princess cakes, you would already know this.  The princess cakes are egg & gluten free and are a yummy toddler approved morning tea.)

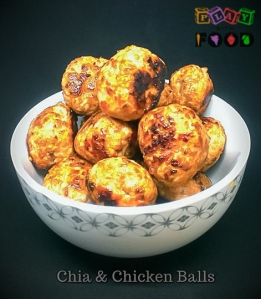
For those playing at home with the materials I have given you in class and are trying to assist your child overcome a food jag, this is a recipe that you can use if you are transitioning to whole pieces of meat from processed meat (eg. wanting your kids to have chicken breast as opposed to processed chicken nuggets).  It’s also perfect for families that have to consider an egg allergy.   Families should aim to have the one meal and this is a great recipe that will satisfy everyone.  Use the best chicken mince that you can & the texture of the balls will be between that of the chicken nugget & a chicken breast.  You can spice it up as you please (however, remember radically changing the taste profile for food jaggers is the final step in the transition.)

Chia & Chicken Balls | Why they are great for fussy kids | Play with Food

Recipe:

  1. Soak 2tsp of chia seeds in 4tsp of water for at least 10mins until gluggy.
  2. In the meantime, sautee 1 clove of finely chopped garlic & a rasher of finely chopped bacon.
  3. Then once cooked & in a separate bowl, combine the bacon mix, 1/2 cup multigrain breadcrumbs, 2tbsp tomato paste, 1tbsp Worcestershire sauce, chia mix and 350g chicken mince.
  4. Roll into balls & cook in the pan

If you are interested in learning more about our toddler, preschooler or 5-7yo class programs.  Have a look here for our current schedule!

If you have any questions about this recipe, food jagging or just love chicken meatballs – leave me a comment below!

Happy Eating!
Simone Emery
Princess Cakes

My mission was to orchestrate a fun day for my 2yo and her cousin (nearly 4yo) – a princess day. I wanted memorable activities, yummy fun food & a good chance for them to bond.

The activites included princess story books, playing outside and designing their own t-shirt. I helped the girls select pictures to print onto iron-on transfer paper and then we ironed them onto pre-purchased t-shirts.

What I was most excited about was using my daughter’s enthusiasm to help me in the kitchen. She helped grate the carrot (by holding her hand within mine.)  She put ingredients that I measured out into the blender and she poured the batter into the awaiting party cake holders.

Toddler snacks should be appropriately sized. I like to bake in smaller portion sizes for a few reasons:
1) less tendency for my daughter to over stuff her mouth.
2) you can serve with other food groups for a more balanced snack or meal.
3) less wastage if they don’t eat it all.
4) extras can be frozen for snacks on the go – wrap in cling film individually before freezing.

image

Princess Cakes

3/4 cup rice flour
1tbsp chia seeds, soaked in 2tbsp cold water for at least 10min
1 medium sized carrot, finely grated
1/3 cup cooked sweet potato
1/3 cup brown sugar
1 cup milk
1tbsp butter
1/2 cup shredded coconut
1tsp vanilla extract
1tsp ground cinnamon

Preheat your oven to 180oC and grease your patty cake tin (or you can use mini cup cake holders). I used spray on coconut oil.

Put all ingredients into the blender. Whizz until all ingredients are well combined.

Pour batter into cake tin & bake for about 20mins (until cooked through). Tip: the mixture does not rise so fill the tins to the brim. Gently shake to level out the batter in the tin. This mix should make approx 18 mini-cakes.

To decorate these cakes I made a tiny batch of pink butter cream icing & store-bought sprinkles. The girls used knives that come with toddler cuttlery sets to apply the icing.

All toddler cooking should be supervised.

Happy Eating!
🙂 Simone

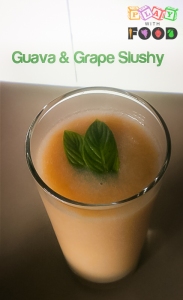
Guava & Grape Slushy

  •  Point One: This week is Allergy Awareness week
  • Point Two: May is also the “G & H” challenge for the Eat A to Z Healthy Recipe Challenge.  Something I recently stumbled upon & thought I’d try to participate in. Here is a link to the Eat A to Z Healthy Recipe Challenge pinterest board (for more inspiration).
  • Point Three: Winter is on our door step here in Australia and it’s time to boost your Vitamin C intake.  This claim is made despite the beautiful t-shirt weather we experienced here in Sydney today.

So, to acknowledge all three points above, I came up with a fun, new (allergy free) drink for our afternoon tea today – a Guava & Grape Slushy.  I loved that this drink (with a small pepita & cranberry bar) was enough for us to be sustained during the witching 2-hours before dinner.  (Please see my post about afternoon snacks for more ideas about how to cure 3:30-itis without spoiling dinner).

Why Guava?  
In 100g of guava there is 228.3mg of Vitamin C which is about 4 times the amount found in Oranges!  
Guava also contains a relatively high antioxidant value compared to other plant foods.

Grape & Guava Slushy by Play with Food


Ingredients:

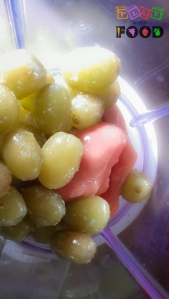
  • 1 cup frozen green grapes
  • 6 tinned guava halves with seeds removed
  • 1/2 cup of water or ice cubes (depending how icy you like your slushy)
  • 1 sprig of mint (optional)

Method:

Blend all ingredients.  Serve in 2 medium sized cups.

PlaywithFood-1-5

Happy Eating!

Simone

 

Powered by Linky Tools

Click here to enter your link and view this Linky Tools list…

Easter Brownies

For Easter, I’ve come up with two recipes for brownies using Cadbury Creme Eggs.  The Cadbury creme eggs are optional because the two recipes are reasonably healthy when you don’t add the Easter eggs.  However, it is that time of year when the Easter bunny is knocking at the door!  Maybe these recipes give you a good excuse for the kids to donate their eggs for a greater purpose? These recipes are designed for you to make with the kids.

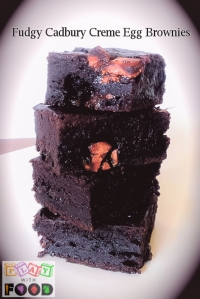
Fudgy Cadbury Crème Egg Brownies {Egg Free Base}

PlaywithFood--6

The first brownie recipe gives a really rich, moist and fudgy consistency.  This recipe is also ironically egg free and lower in fat & sugar – does that make adding the crème eggs OK?   (I think so!)  It is also a great recipe for kids to participate in as I have made all the measures in ½ cup increments (making less dishes for you!).  However, if you are after a totally egg free recipe – do not add Cadbury Crème Eggs as they contain egg.  Instead try other types of mini eggs that are available & check their ingredients list.  The pumpkin is the key ingredient used to substitute in for the egg.  Pumpkin is used to bind the ingredients together.

Ingredients:

  • ½ cup cocoa
  • 1 cup wholemeal flour
  • 1 tsp baking powder
  • 1 tsp cornflour
  • ¼ tsp salt
  • ½ cup castor sugar
  • ½ cup yoghurt
  • 1 cup pumpkin puree, cooled
  • ½ tsp vanilla essence
  • 1 tbsp coconut oil
  • 1 x 130g packet of Cadbury Mini Crème Eggs

Method:  (Where you see an A – it is an adult step and K – is a kids step)

Step One:
A – Steam, puree and refrigerate the pumpkin in advance. (I made mine the night before as extra with dinner.)
A – Preheat the oven to 180oC and grease an 8”x8” brownie/cake tin.
K – Measure out and add the dry ingredients (excluding the Cadbury crème eggs) to a bowl.

Step Two:
K – In a separate bowl, mix the wet ingredients and then add them to the dry ingredients.
A – Check the batter for sweetness (add more sugar if required remembering that the Cadbury crème eggs will add sweetness too).  BONUS: It is safe to eat this batter raw due to lack of raw egg in the mixture!

Step Three:
K – Remove the foil from the Cadbury crème eggs and break them in half.  Add the eggs to the batter.  After mixing in the chunks of crème eggs, spread the batter out in your tin evenly.
A – Place brownies into the oven to bake for 30-40min. (Test that the brownies are cooked after 30min with a skewer, if not leave to bake for an extra few minutes).

Cadbury Creme Egg Brownie Cake {Dairy Free Base}

PlaywithFood--7

The second brownie base recipe that I have developed to go with the Cadbury Crème Eggs is Dairy Free.  Please note, you should add dairy free chocolate chips instead of Cadbury crème eggs to ensure the whole product is dairy free.  This brownie recipe has more of a cake like consistency.  I actually ended up baking it in a smaller round pyrex 8” bowl instead of a brownie tin.

As a deviation from my usual baking recipes I used weights (instead of cup measures).  This gives kids the chance to practice some numbers & requires electronic scales that you can zero after each ingredient is added.  Or conventional scales that you can individually weigh each ingredient on before adding it to the bowl.

Ingredients:

  • 80g Castor Sugar
  • 100g Nuttelex (or other dairy free source of fat)
  • 2 eggs
  • 60g water
  • 150g wholemeal flour
  • 50g cocoa powder
  • 1 tsp baking powder
  • Pinch of salt
  • 1 x 130g packet of Cadbury crème mini eggs

Method:  (Where you see an A – it is an adult step and K – is a kids step)

Step One:
A – Preheat the oven to 175oC and grease and line an 8” brownie/cake tin.
K – Measure out the castor sugar and nuttelex and cream them together in the bowl.

Step Two:
A/K – Break and add the two eggs
A/K – Zero the scales & add the water (it’s about ¼ cup)
K – Zero the scales and add the wholemeal flour and then zero again for the cocoa powder
K – Add the baking powder along with the pinch of salt and mix really well

Step Three:
K – Remove the foil from the Cadbury crème eggs and break them in half.  Add the eggs to the batter.  After mixing in the chunks of crème eggs, spread the batter out in your tin evenly. (Note: This mixture is very thick & is challenging to spread out evenly)
A – Place brownies into the oven to bake for 30-40min. (Test that the brownies are cooked after 30min with a skewer, if not leave to bake for an extra few minutes).

Happy Eating and Happy Easter!

Are you on team carrot?

Carrot is stupidly versatile!  I can’t think of a cuisine that doesn’t use carrots in one way or another. However, I have to admit to it being one of my least liked vegetables growing up. Now I am happy to say that I am on “team carrot”.

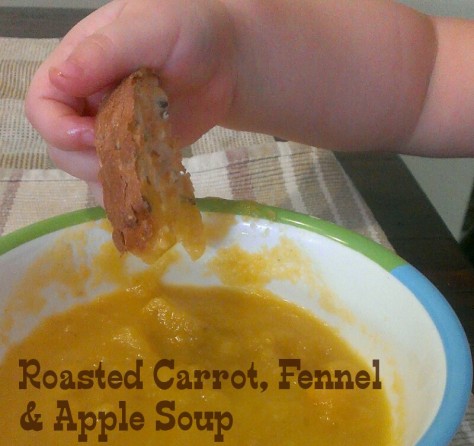
Last night I made a quick carrot & fennel salad (both chopped raw & topped with juice from one orange + olive oil). We had a fair bit left over. So I decided to try my hand at a roasted carrot, fennel & apple soup for lunch with my toddler.

She went back for seconds!

image

Ingredients:
3 carrots (chopped)
1 fennel bulb (chopped)
Juice from half an orange
Drizzle of olive oil
1 apple (chopped – leave skin on)
500ml vegetable stock
1 clove of garlic (finely chopped)

Method:
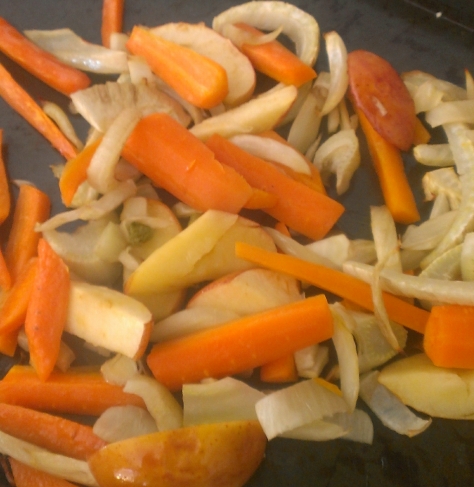
Combine first four ingredients & spread out of a baking sheet. Bake in a 180oC oven for 20min. Add the apple to the mixture giving everything a good turn over. Roast for a further 10mins.

Bring vegetable stock to the boil and add the chopped garlic. Add the roasted medley to the stock & simmer for 15min. Puree to get a nice smooth soup with a handheld mixer.

The good thing about this soup is that you could do the roasting in the morning & then the final steps quickly for dinner.

image
Roasted carrots, fennel & apple

I served ours with a slice of multigrain toast.  My daughter loves to dip her toast fingers in soup. She inhaled this soup & went back for seconds. I loved it too!

Pear Flapjacks For Kids

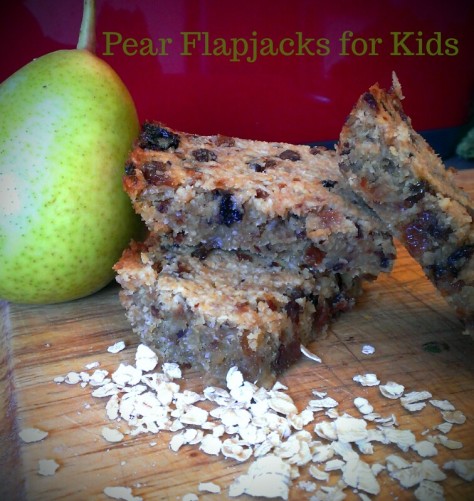
Inspired by a fellow blogger, I adapted her recipe this week, healthy flapjacks, to suit the ingredients I had on hand. The result was so quick & easy to make and is a perfect lunchbox counterpart packed with fibre!

Fun fact: Did you know one medium pear has 5.5g of fibre? Hence, it is one of the most fibre rich fruits.

On the super healthy kids blog, they have been talking all things fibre this week. So, I recommend having a look at the recipes they’ve been posting.

Pear flapjacks for kids
Ingredients:
1 1/2 cups of Oats
1/2 cup Dried Mixed Fruit
2 peeled, cored & chopped ripe pears (you don’t have to peel it & this way you keep more fibre)
Juice from half an orange
1/2 cup Dessicated coconut
1tbsp Honey
2tbsp Macadamia nut oil
1tbsp Butter

image

Method:
Preheat your oven to 180oC & get out a 20cm x 20cm square cake tin.
In a food processor, whizz oats, dried mixed fruit, coconut, orange juice and pears to get a thick paste.

In a saucepan melt the butter together with the honey and macadamia nut oil. Pour this into your tin (this acts to grease the tin too) and swirl it around. Mix in the oat mixture. Pat the flapjack mixture down into the tin & pop it into the oven for 20mins.

Cut it into bar like slices once it is out of the oven. You can store these in an airtight container in the fridge for up to 7 days.

Happy Eating!
Simone
Enjoy watching your toddler feed themselves lentils!

I will be trying this recipe with my toddler!
Enabling your toddler at mealtimes by handing over control helps them establish healthy eating habits. Finger food options, like these, are perfect for letting them learn.
What are your favourite toddler finger foods?

Vegie Smugglers

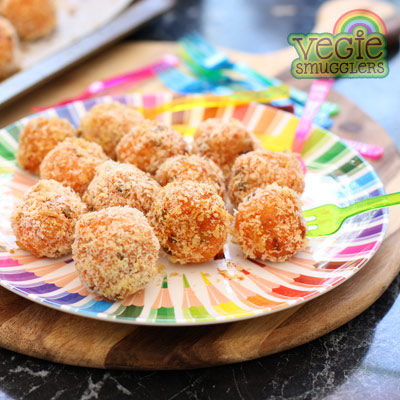
Yes, it’s true, these little balls of deliciousness are perfect toddler food but they’re also a popular snack with older kids, too. The secret is that the sweet potato (or kumara), is ROASTED, so they’re rich and enticing which means the lentils aren’t noticed at all.

To get the mash, I chuck the whole sweet potato into the oven (don’t peel it or anything so tedious) and cook it for about an hour at 180C. Then, whenever you’re ready during the day, you can get onto making this super-healthy, egg-free snack.

Perfect for independent toddlers Perfect for independent toddlers


Sweet potato, lentil & rice balls

1 cup roasted sweet potato
1 cup cooked brown rice (or white rice is ok, too)
1/2 cup grated cheese
1/4 cup cooked brown lentils (I use tinned – give them a good rinse)
1 tbsp tomato chutney (or beetroot relish is also good)
1 cup panko breadcrumbs (or…

View original post 193 more words

St Patrick’s Day Drinks

Happy St Patrick’s Day!

No this post isn’t about Guinness … It is about green smoothies.

Smoothies are a great way to pack in lots of nutrition into your meals. Smoothies are a big hit at our place! If I have any smoothie left over, its poured into little ice block moulds for a special dessert or afternoon treat later down the track.

Green smoothies are all the rage at the moment – kids like calling it “monster milk”.  It is handy to keep some green seedless grapes or a chopped banana in your freezer so you can get a smoothie ready when your heart desires. Or you can use frozen banana for a healthy ice cream base and frozen grapes as a healthy sorbet base.

To celebrate St Patrick’s day we had a green smoothie for lunch with a green main meal of risoni pasta, peas & salmon.

Today’s smoothie was:
1 cup frozen green grapes
1 tub of banana kids yoghurt (100g)
Leafy parts of a large kale stalk
1 cup of water

(makes enough for 1 large or 2 medium smoothies)

What is your favourite smoothie recipe?

image

Happy Eating!
Simone

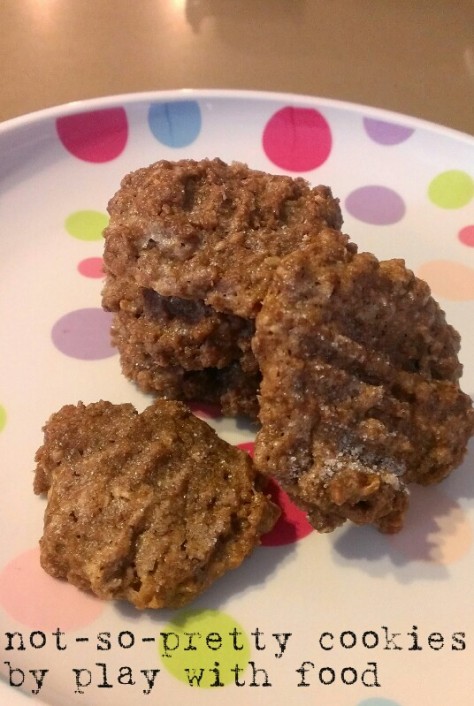
Not-so-pretty cookies

Inspired by pinterest again, I tried out my own version of real mom nutrition’s peanut butter cookies.

image

The result is not-so-pretty but they are biscuits (cookies) with a delicious personality. My 22 month-old made these & helped press a sugar dipped fork into the tops which probably added to their failings in the looks department.

Ingredients:
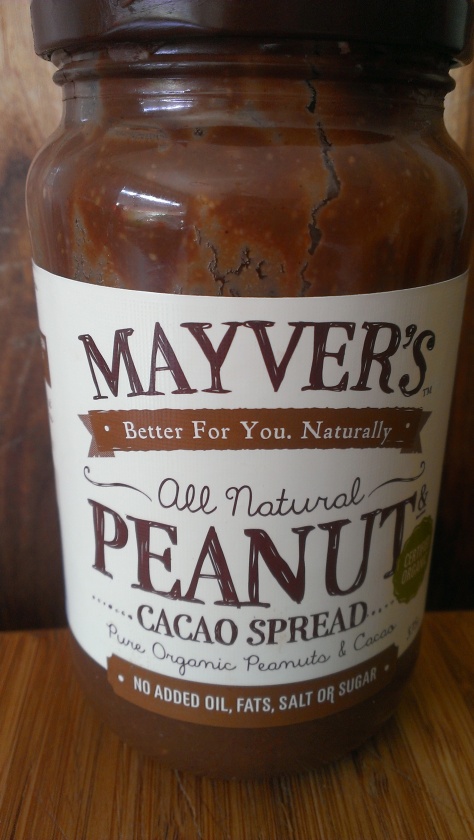
3/4 cup mayvers peanut butter with cacao (see pic below)
1 egg
1/2 cup sugar
1/2 cup quick oats

Mix all ingredients & dollop spoonfuls onto a baking paper lined tray. Use a sugar dipped fork to flatten. Bake for about 15mins in a 180oC oven.

image

February is Eggplant Month

At the beginning of the year, I set out a monthly challenge to make dishes from seasonal products and see how my toddler liked them. To see upcoming challenges see my Happy 2014 Post here! The benefits of setting and sharing this challenge include:

1) Eating seasonally is budget and local farmer friendly
2) It stretches my cooking repertoire
3) Seasonal produce goes from farm to fork quicker and is nutritionally better for us!
3) It encourages new food appreciation for my family, especially my toddler.

February is Eggplant Month!

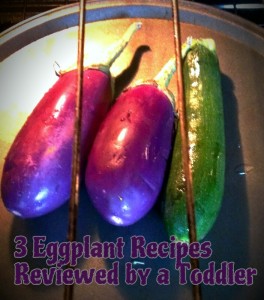
eggplant

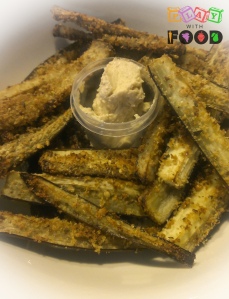
Recipe #1: Eggplant Chips

Toddler Review: She sucked the crumbs off and ate mushy inside of the chips – but left the skins behind.

Ingredients & Method:  Sliced one large eggplant and cut into “steak fry” sizes.  Coated with a drizzle of olive oil and then tossed in multi-grain breadcrumbs.  Baked at 150oC for 40mins.

Eggplant Chips served with Hummus

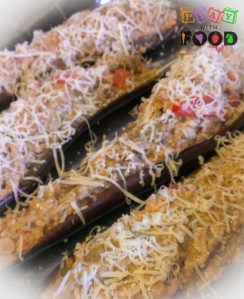
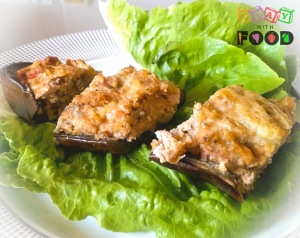
Recipe #2: Burghal & Pork Stuffed Eggplant

Toddler Review: Toddler loved the stuffing mix.  However, was not fussed on eating the actual skin of the eggplant again.

Ingredients & Method: Take 2 Medium sized Eggplants and roast them whole in the oven at 150oC for 1 hour. Remove and let them cool down a bit.  Make up your stuffing mix next by letting 1/3 cup of burghal absorb 2/3 cup of boiling water in a heat proof bowl (takes about 5 min).  In a pan, sautee a diced brown onion in some olive oil.  Once the onion is starting to go transparent, add 200g of pork mince and cook through, add the burghal, 2 tbsp of tomato paste, 1/3 cup of diced caspisum, 1 tsp dried oregano and a handful of chopped fresh basil.  Cook all together for a few minutes until fragrant.  Remove from the heat.  Cut your eggplants in half and remove some of the larger veins of seeds.  Add the flesh of the eggplants to your stuffing mix.  Add an egg to the stuffing mix and combine well.  Put the stuffing mix into the shells of the eggplant and finish with grated cheese.

PlaywithFood-1876Return the stuffed eggplants to the oven for a further 30 min until the stuffing is fully cooked and the cheese is browned. Serve with salad.

PlaywithFood-1-3

Recipe #3: Zucchini and Eggplant Dip 

Toddler Review: “yum”  – my toddler loves dipping sauces though!

Ingredients & Method: Roast 2 medium sized eggplants on 150oC for 1 hour with 1 medium – large size zucchini.  Coarsley chop the zucchini (skin as well) and remove the flesh (including seeds) from the eggplants and put this into a food processor.  Add 1 cup no fat greek yoghurt, a pinch of salt, a pinch of black pepper, 2 tbsp of olive oil, 2 tbsp lemon juice (or juice from 1/2 a lemon) and 2 cloves of garlic crushed.  Blitz in the food processor, spoon into serving dish and then top with an additional drizzle of olive.  We had ours served with some sourdough rolls.  It is also really great chilled and served later.  A great dip to make ahead for a party or BBQ!

PlaywithFood-002

Quick boost pikelets

It would be no surprise to parents of 2 (or more) that the transition to a larger family size has it’s good & “not so good” moments. Last night we had a “not so good” string of moments with our jealous toddler. So, this morning we needed a quick boost brekky – a bit of a change from our normal routine (without making it taxing on me).

We made some quick wholemeal pikelets with dried fruit. My daughter helped (mostly between jealous tears as I was holding the baby) and soon cheered up watching the cooking pikelets.

image

Quick Pikelet Batter:
Mix 1/2 cup wholemeal flour, 1/2 tsp of baking powder, 1/2 cup low joule lemonade or soda water, 1 tbsp golden syrup or honey (depending on how sweet you like pikelets) and a handful of dried fruit.

Do you find a little change up to your routine or making a special meal can help ‘reset’ your family?

Cooking with Kids

Before I started blogging my recipes (this year), I regularly published recipes to my Facebook page & also I write recipes for Mum’s Lounge.  The recipes for Mum’s Lounge are in a “little one & me” format, where I step out what the kids can do and what the adults can do to complete the recipe together.  I really and truly believe cooking with the kids leads to wonderful conversation and food awareness …. but don’t just take my word for it….

Why involve kids in the kitchen?  Children who learn to cook before the age of 8 are 50% more likely to have healthy diets!  Read more here  

Today’s post summarises my “little one & me” recipes for you to have a look at:

"Monster Balls" served with a white bean dip
“Monster Balls” served with a white bean dip

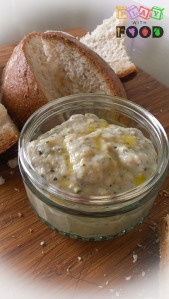
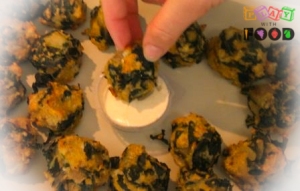
My FAVOURITE “little one & me” recipe is for these Monster Balls.  Why is it my favourite?  Because it is so versatile.  You can use the basics of this recipe (bread crumbs, eggs & cheese) then choose any left-overs / or a clever mix of your child’s tolerated and preferred foods to make these.  See the variations list in the introduction to the recipe and some ideas for dipping sauces at the end.  Giving food clever names will help engage your children to a theme & spike their interest in trying it out.  There is nothing wrong with having a bit of a laugh in the kitchen!

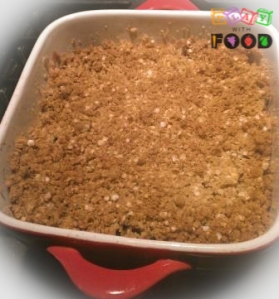
Strawberry and Apple Crumble with the added goodness of Quinoa is a great celebration of springtime flavours when strawberries start hitting the green grocer.

Strawberry & Apple Crumble

Healthy Gummy Stars are a good recipe for lolly alternatives.  They are a very firm jelly made with real fruits and no cane sugar.  The little ones can probably only assist when it comes to cutting out the stars (or whatever shapes you have).

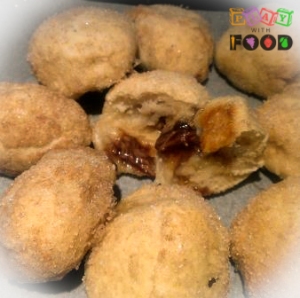
Easy & Healthier Snickerdoodles are a great motor planning exercise with the children as they wrap the dough around the filling.  Plus, they taste so good whilst still warm from the oven (note: if you use chocolate buttons / squares they stay piping hot for a while so always taste test them first for correct temperature before letting the kids loose on them – plus this way you ensure to get your share of them before it’s too late!)

Chocolate Button & Banana Filled Snickerdoodles

Also, check out the dough that I use for the snickerdoodles because it can be made sweet or savoury, it is super easy AND is egg free!  We use this dough recipe regularly for pizza bases in our house.

Zucchini & Sesame Quackers (Crackers) is a great make ahead recipe for a party or gathering where you are told to bring a plate.  You can enhance the flavour of these crackers with herbs or parmesan cheese, depending on your taste preference & any allergy considerations you have.  The version I have made here is dairy and egg free.

A big hit on the Play with Food Facebook page in 2013 were my sweet vegie muffins and I have to say that they are so nice straight out of the oven.  You can also substitute the golden syrup with honey.  There are some good tips in the comments too for encouraging interaction with the kids during this recipe.

Wishing you all the best for some “little one & me” cooking time!

HAPPY EATING!

Simone Emery
The Family Meal and a Korean Inspired Pork Recipe

I use the term Family Meal often through my blog, facebook posts and my classes.  This is a way of organising your meals so that the whole family can participate in them no matter where your children are at on their eating journey.  A family meal doesn’t have to include everyone, yet it does at least have to have 2 people.  Some of the pointers that we guide parents through during our lessons include the following:

  1. Ensure that children have appropriately set-up eating positions.  They should sit with a 90o angle at the hips, knees and the ankles.
  2. Decide on the environmental cues that will help your child to eat and avoid cues that have been previously associated with negative feeding behaviours.
  3. Engage the child in some movement before the meal to help them organise or reset themselves.
  4. Family style meal serves where everyone takes something from each plate provided – they can put it on their plate or onto their learning plate.  Do this instead of plating up for the child in advance.
  5. At every meal offer: a preferred food, a carbohydrate, a dairy, a fruit, a vegetable and a protein. (** Simone’s tip for busy carer’s is to work towards a balanced diet over the day**).
  6. After 15-20 minutes of eating, instigate “clean-up time”.   (A great routine you learn at Play with Food lessons that transitions to the home environment)

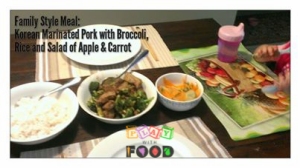
Last Friday I had a huge win with my evening family meal, Korean Inspired Marinated Pork with Broccoli, Rice and a Salad of Carrot & Apple.

  1. The meal contained 4 food groups, grains, meat, fruit and vegetables
  2. It provided vocabulary extension opportunities with my 21mth old
  3. I was very proud of adapting a pork marinade recipe to suit our family (see below)
  4. The meal was all eaten

If the meal wasn’t all eaten, leftovers are safe to wrap from the family style serving plates as opposed to wasted if all food was preserved & mostly refused.

korean pork-1

Korean Inspired Pork & Broccoli (makes enough to marinade 300g diced pork fillet):

For the Marinade:

  • 1/2 apple cored, peeled & roughly chopped
  • 1/3 onion peeled
  • 20ml dark soy sauce
  • 1 tbsp brown sugar
  • 1 clove of garlic
  • 1/2 tbsp sesame oil
  • 1/2 tbsp rice vinegar
  • 1/2 tsp black pepper

You will also need:

  • 300g Pork fillet cut into strips
  • Peanut (or vegetable) oil
  • 3 Shallots, chopped
  • 1/2 head of broccoli, broken into bite size florets

Add all marinade ingredients to a food processer and blitz.  Pour marinade over pork and refrigerate for at least 30 mins.

Stir-fry the shallots and broccoli in some oil and once cooked to your liking, transfer to a bowl. Drain the pork from the marinade (reserving the marinade for later).  Stir fry the pork on its own in a little bit of oil (you may need to do this in batches so the pan is not overcrowded which results in boiling), once cooked through add the reserved marinade and the broccoli mix.  Put into a family serving bowl for the table.

HAPPY EATING!

Simone Emery
January is Fresh Chive Month

As you may have seen in my Happy 2014 blog post, my new years resolution is to take on a seasonal fruit / vegetable each month to expand my cooking repertoire.  It’s also a bonus if I can use this fruit/vegetable to make a kid approved meal (or snack).

January’s Challenge: Fresh Chives

To tell you the truth, I had never actually used fresh chives in my cooking before.  I found them to be a great taste booster this month and will definitely be using them again.  It is wonderful to introduce new tastes to babies, toddlers and children through using different herbs.  Herbs do still count as part of your daily vegetable intake.  However, you don’t use much of them so they don’t make a substantial impact on your RDI.  But if they make the flavour more appealing/exciting they can help increase the amount eaten of meat, cereal, dairy, fruits or other vegetables.

I made 3 unique dishes with the fresh chives in January:

  1. Baked Eggs in Tomatoes with Chives
  2. Pear & Chive Filo Parcels
  3. Soba Noodles with Zucchini, Creme Fraiche & Chives

The biggest hit with my toddler was the Soba Noodles.  However, I figured it would be a no-brainer, as noodles are one of her preferred foods and so is zucchini.  The Filo Parcels were my favourite.  I found the chives gave the pear such an amazing flavour and I love the crispy filo pastry.  See my notes below the recipe about my meal tactics and why my combination of foods would be great for you to copy if you have a fussy eater on your hands.

Baked Eggs in Tomatoes with Chives

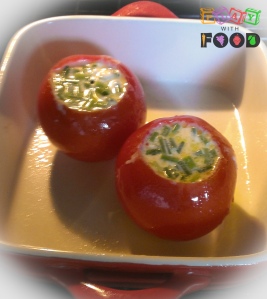
This is a simple idea for a lunch or brunch.  Take the top off of your tomatoes and hollow them out. Chop up some fresh chives & whisk them into the egg with a small dash of milk.  Fill your tomatoes with the egg mixture and bake at 180oC for 30min.

PlaywithFood-1799

I do have to admit to failing on this recipe once by using a bit too much milk and running out of baking time.  Under pressure from my eagerly awaiting daughter, I decided to turn her baked tomato into what I call Vegie Eggs.  Basically, what I do is chop/grate up vegetables & fresh herbs that I have, mix with a dash of milk & an egg in a ramekin and microwave for 1 min.  The egg will be cooked through and is like a little dome of omelette without the fuss of using a pan.  This is great for getting vegies in at breakfast during the mid-week rush.  Hint: you can also reserve the middles of your tomatoes from the above recipe to make vegie eggs the next day.

Pear and Chive Filo Parcels

I LOVED this for lunch with my daughter!  We had one pear between us to make 2 parcels. After I tasted it, I wished I had made us 2 parcels each because they were so yummy.

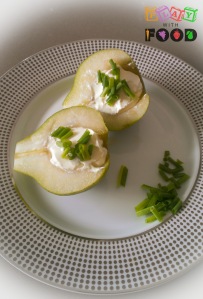
Prepare the pear with creme fraiche & chopped chives

Take a pear and cut it in half from top to bottom removing the seeds & the stalk.  Fill the cavity (from the deseeding) with 1 tsp of creme fraiche.  Top with chopped fresh chives.  Wrap each pear half in a sheet of filo pastry and ensure it is sealed by brushing on some milk around the edges (or I just used a finger full of creme fraiche).  Cook this in a 180oC preheated oven for 15mins.  You should see that the pastry goes a nice golden colour at the edges.

Serving Suggestion for Kids:

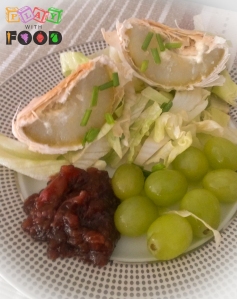
My daughter loves filo pastry so she was happy to have the parcel on her plate.  The pear can be very hot straight out of the oven – So, I cut it up to cool on her plate.  In the meantime, I had available for her some grapes to choose (a preferred fruit) and shredded iceberg lettuce (our learning vegetable).  She was happy to talk about the temperatures of the hot pear and the cool grapes & lettuce.  We then made “wheels” out of our shredded lettuce by spinning the lettuce between our forefinger & thumb.  We drove our wheels through the “mud” – ie. Stonefruit Chutney (see recipe here).  Having a condiment and a game with the shredded lettuce helped her motor plan a new way to eat her shredded lettuce and gave her something to bite into.  Lettuce can be tricky for children as it is hard to get into their mouths and then when it is there it can be hard to maneuver with their tongue.  A thicker condiment, like a chutney, can add some bulk to it.

PWF left upper

Another part of play with food lessons that I incorporated into this lunch was my love of breaking down the barrier between fruits and vegetables by combining them on the same meal.  This is a link to some of the other topics we cover in lessons.

Soba Noodles with Zucchini, Creme Fraiche & Chives

Cook your Soba noodles as per the packet instructions.  I like to vary up the types of grains that we eat.  You could use pasta too for this meal.  Once cooked, drain the noodles and add 1/2 a zucchini worth of batons and chopped fresh chives (quantity to your liking).  Allow that to sit for 5-10mins (while you set the table & kick off your wash-up routine).  Stir through a generous tablespoon of creme fraiche and put into a serving bowl for the table.

Note: Zucchini does not need to be cooked (and definitely not over cooked to be a soggy mess).  Check that you are happy with the texture of your zucchini before serving – I like mine a bit crunchy so I only left ours in the hot noodles for 5 mins before adding the creme fraiche.

This is what we served up ourselves for lunch & what my daughter thought of it:

PlaywithFood-1816

I can't talk or pose right now, I'm having too much fun!
I can’t talk or pose right now, I’m having too much fun!

Why is she making such a mess?  She’s LEARNING to eat.  My theory is that they have to learn to eat first before we worry about manners.  Sensory exploration of food is so important for growing minds.

Leave me some comments if you’ve tried Fresh Chives in anything else you think I should try out.  I also pin inspirational recipes for my new years resolutions on Pinterest – so have a look at my boards using the link in the side bar.

HAPPY EATING!

Simone Emery